

AI In Aesthetic Medicine: Outcome Monitoring
If image quality changes from visit to visit, AI outcome tracking stops being reliable. That’s the main point.
If I were to sum up this topic in plain language, I’d say this: AI can help me track skin and treatment results over time, but only if I use the same photo setup each time, review every AI flag myself, and keep clean records. On top of that, I need clear patient consent, strong privacy controls, and a Health Canada check before I bring any AI tool into practice.
Here’s the short version:
- Use standard photos every time: same lighting, angle, distance, and patient position
- Track change with data: scores, heat maps, trend lines, and region-by-region photo review
- Use AI for support, not final decisions: the clinician still decides what to do
- Keep records tight: images, notes, settings, lot numbers, model version, and date
- Set remote follow-up rules: photo instructions, symptom check-ins, and in-person escalation steps
- Watch for limits: bias, weak validation, software changes, and privacy risk
- Check Canadian rules: consent, PIPA/PIPEDA duties, MDALL, MDL, and MDEL
A 1° to 2° shift in angle or a small lighting change can skew photo comparison more than many people expect. That’s why the process matters as much as the software.
| Area | What I focus on |
|---|---|
| Imaging | Same setup at every visit |
| Analysis | Numeric skin scores and side-by-side review |
| Planning | AI suggestions checked by a clinician |
| Records | Structured charting and tool logs |
| Follow-up | Remote photo review with clear escalation |
| Compliance | Privacy, consent, and device licence checks |
If I want AI monitoring to help in practice, I have to treat it like a controlled clinical workflow, not just a photo app.
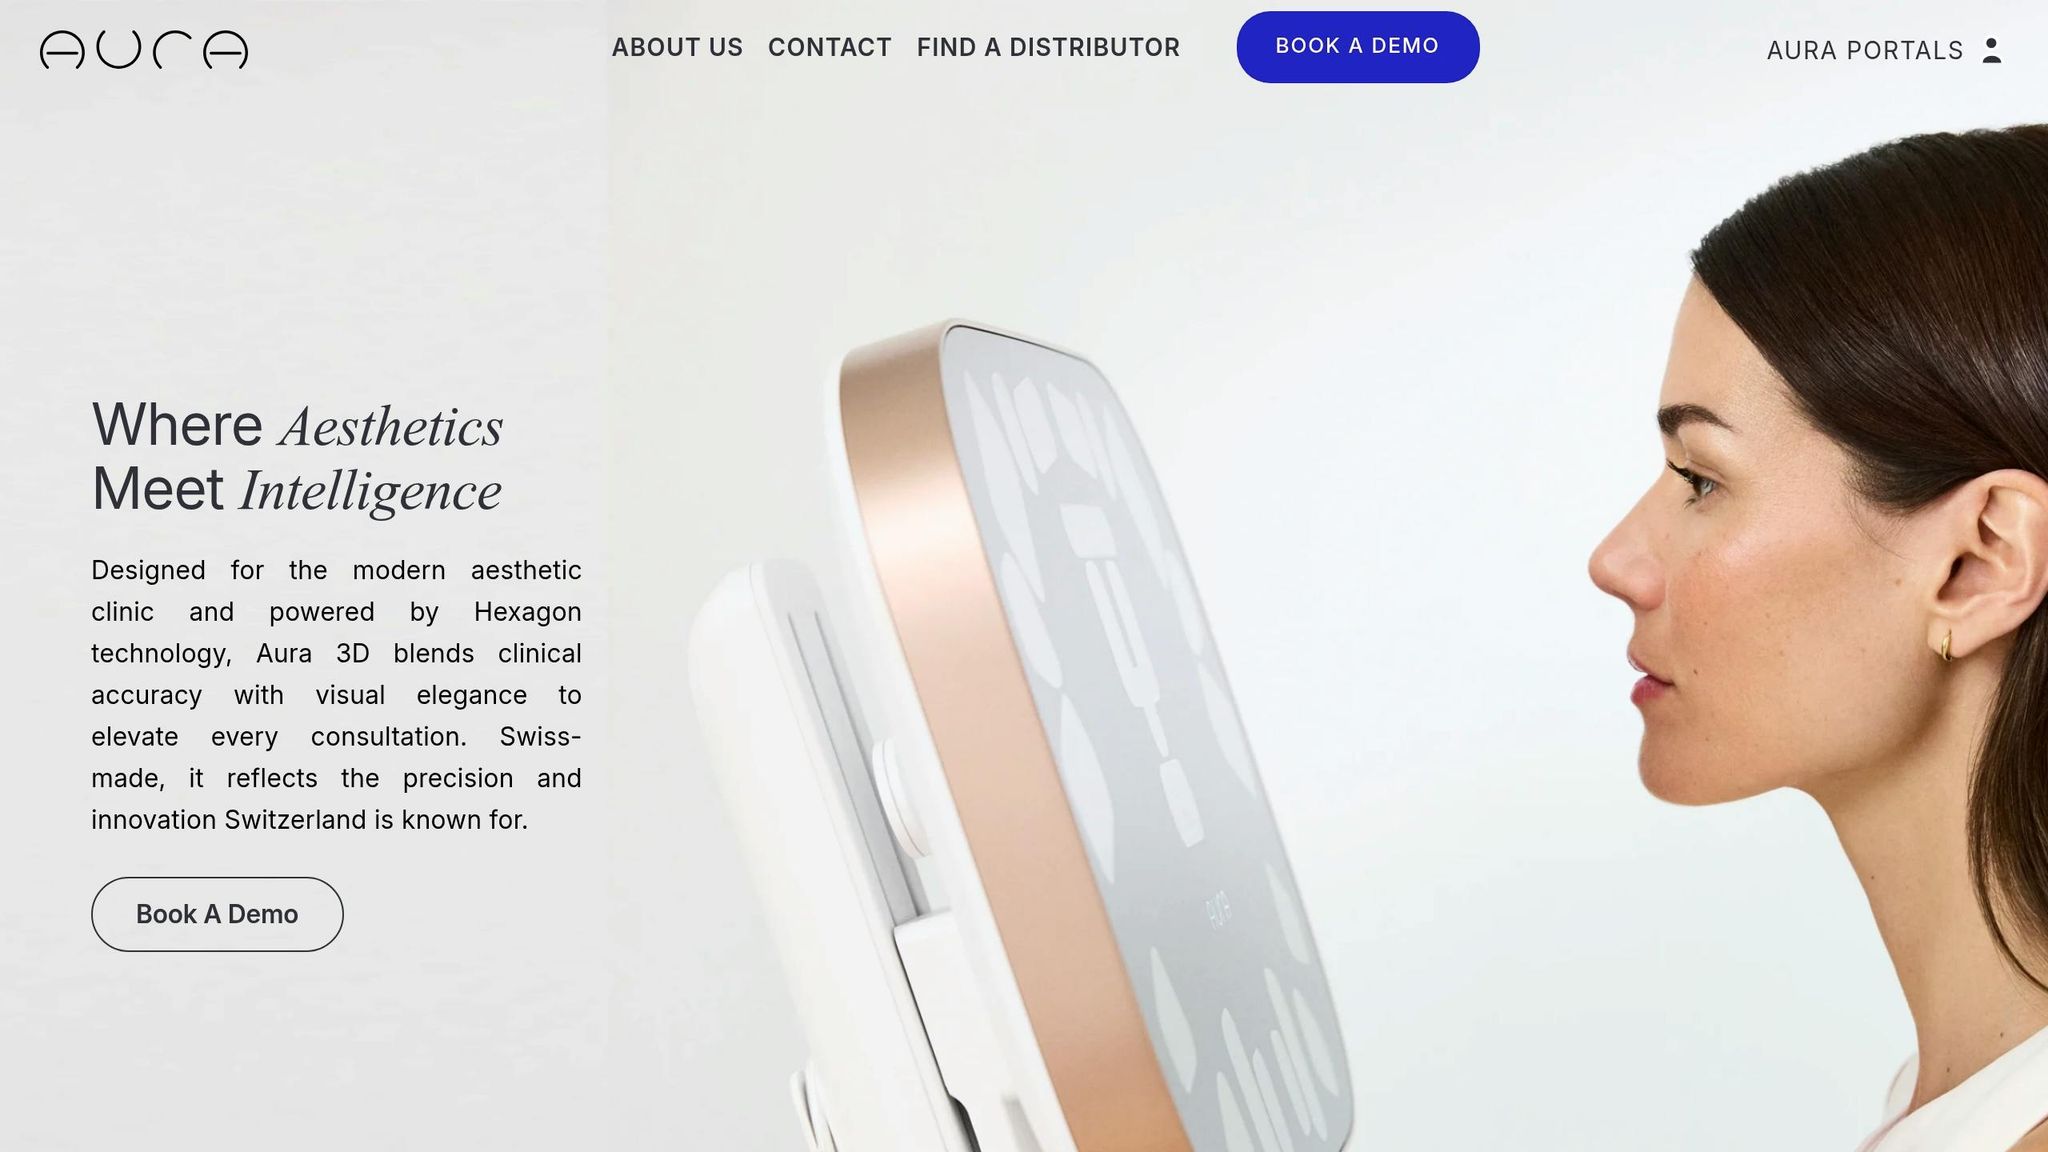
Lacey McKelvy on Aura Reality: How AI Is Transforming Aesthetic Consultations
sbb-itb-8ec3e54
AI skin analysis and photo comparison for measurable results
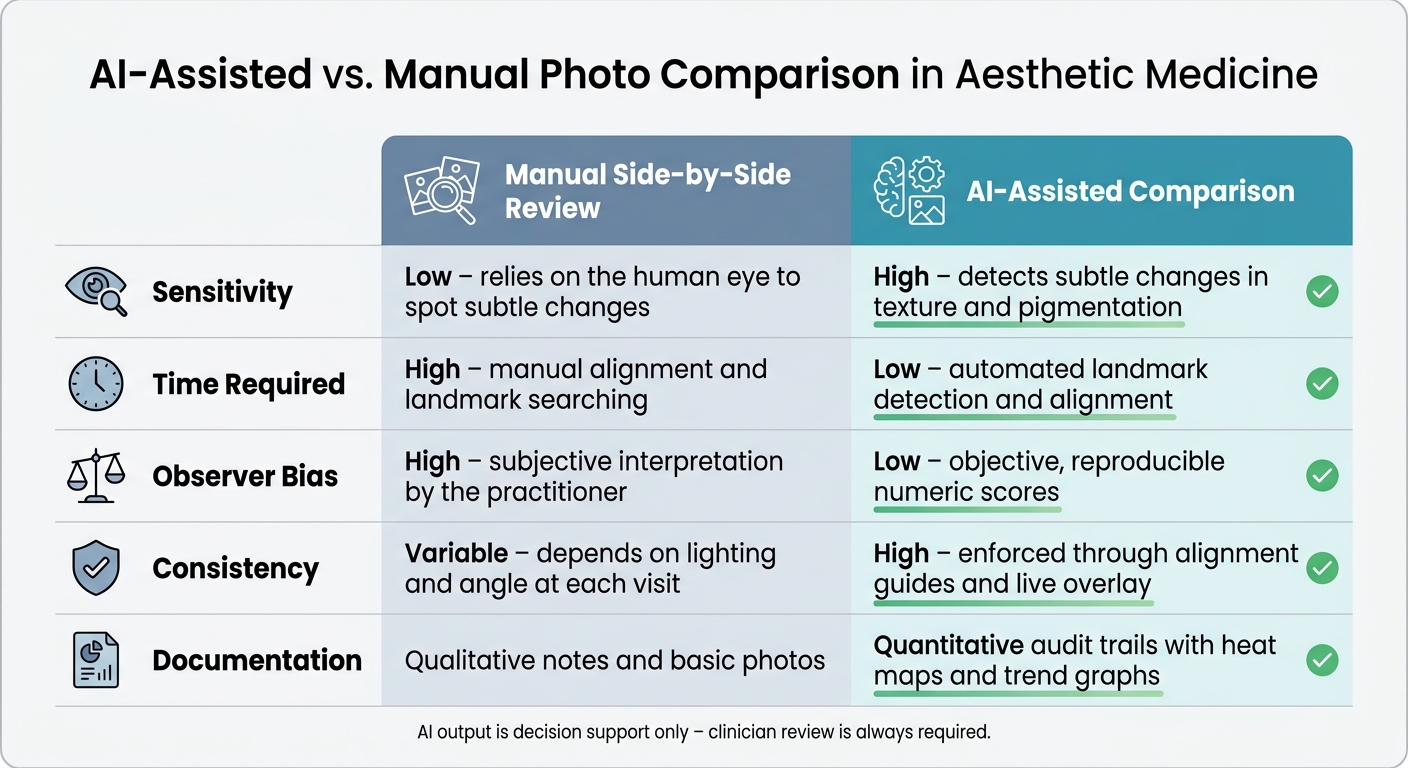
AI-Assisted vs. Manual Photo Comparison in Aesthetic Medicine
Standardized imaging and numeric skin metrics
AI skin analysis is only as good as the images going in. If image capture stays consistent, comparisons are far more dependable. If lighting, angle, distance, or patient position changes, the comparison gets weaker fast.
When capture conditions are fixed, AI systems can turn photos into structured data. That can include numeric scores for concerns like spots, wrinkles, acne, redness, under-eye puffiness, firmness, pigmentation, and elasticity. It can also include heat maps that show where change is happening most, plus trend graphs that track those changes over time.
That gives clinicians something concrete to review with patients and record in the chart. Instead of relying on memory or a general visual impression, they can point to actual numbers and image-based markers. The same consistency also makes regional comparison and treatment tracking more dependable.
AI-assisted before-and-after photo comparison by facial region
AI-assisted comparison uses automated landmark detection to find consistent reference points on the face. It then aligns images with precision before analysing changes across each facial region. Tools that use live overlay by showing a baseline image during a follow-up capture make this process even tighter. Staff can position the patient the same way each time, which gives the AI a much better shot at accurate regional comparison.
AI-assisted review also improves speed, consistency, and documentation:
| Feature | Manual Side-by-Side Review | AI-Assisted Comparison |
|---|---|---|
| Sensitivity | Low; relies on the human eye to spot subtle changes | High; detects subtle changes in texture and pigmentation |
| Time Required | High; manual alignment and landmark searching | Low; automated landmark detection and alignment |
| Observer Bias | High; subjective interpretation by the practitioner | Low; objective, reproducible numeric scores |
| Consistency | Variable; depends on lighting and angle at each visit | High; enforced through alignment guides and live overlay |
| Documentation | Qualitative notes and basic photos | Quantitative audit trails with heat maps and trend graphs |
Choosing imaging setups and training staff
Hardware matters, but it’s only one part of the setup. A high-resolution camera or Wood's lamp in a poorly lit room, with no positioning protocol, will still lead to inconsistent results no matter how advanced the software is. Good outcomes come from the mix of imaging equipment, a controlled room setup, and a repeatable capture process that every staff member follows the same way every time.
Staff training should also go past basic hardware use. Team members need to know how to read AI-generated outputs in a clinical setting. That means understanding what a heat map is showing, what a score shift may mean, and how to explain those findings clearly to patients.
Those same standards also support planning, charting, and follow-up decisions.
AI support for treatment planning, records, and long-term tracking
Treatment planning support and outcome prediction
Once imaging is standardised, AI can help with the next step: treatment planning.
These tools can analyse objective skin metrics like spots, wrinkles, redness, acne, firmness, and facial volume. That gives practitioners a data-backed starting point before recommending injectables, laser resurfacing, or other treatments.
AI can also help with visualisation and prediction. For example, it can use 3D modelling and augmented reality to show patients possible results. It can also simulate short-term swelling and healing, which makes the discussion a lot easier to follow. In device-based treatments, AI may help guide energy settings through real-time skin analysis, but the practitioner is still responsible for the final settings.
That point matters. AI output is a reference, not a prescription. Every prediction or recommendation still needs review by a qualified practitioner, based on the patient’s anatomy, medical history, and clinical judgment.
Structured record keeping with images, notes, and AI audit trails
Planning only helps if the outcome is recorded clearly in the chart.
The same data used for planning should strengthen record keeping too. AI can make charts more complete and easier to search. Instead of leaning on manual notes that may miss product details, batch and lot numbers, dose, injection sites, or device settings, AI-assisted systems can prompt staff to enter structured data and auto-tag images with relevant metadata.
For legal traceability, each AI tool should be logged in the patient chart, including:
- Model name
- Version
- Date
- Session settings
This matters if a patient questions an outcome months or years later.
AI-assisted records can improve completeness, searchability, analytics, workflow speed, and auditability.
Consent records need careful separation as well. Consent for clinical charting does not cover internal training use or social media marketing. Those uses need separate documentation.
Building patient timelines to improve re-treatment decisions
When you link images, treatment details, doses, device settings, and follow-up scores across visits, you get more than a stack of records. You start to see a pattern.
Over time, a structured patient timeline can show how a specific area responds to a certain product or energy setting, how long results tend to last for that person, and when outcomes begin to plateau or reverse.
These timelines are most useful when they combine standardised imaging, AI-measured skin scores, and linked treatment variables. That makes it easier to compare response patterns by facial region or body area and support more consistent re-treatment decisions over time.
They also make follow-up review more straightforward. And they can make remote follow-up checks easier to interpret.
AI-assisted follow-up and remote monitoring in Canadian practice
Once timelines are in place, the next job is follow-up. Remote monitoring helps clinics keep an eye on recovery between appointments, as long as the team uses the same review steps every time.
Digital follow-up schedules and photo submission protocols
Set a steady follow-up schedule for each treatment so recovery data keeps coming in after the visit. A simple structure works well: an early check, a healing check, and a later review. That gives the clinic a clear way to track how recovery is moving over time.
For patient-submitted photos to help, the instructions need to be precise. Use image overlays so patients can match the right angle and distance before taking a photo. That makes each set of images more consistent from one check-in to the next. When submissions follow the same format, it's much easier to compare recovery over time.
Photos also work better when they come with a short symptom check-in. Ask about:
- swelling
- discomfort
- sensitivity
- unexpected changes
This gives the reviewing clinician context before looking at the images.
Those photos become even more useful when AI can compare changes across visits.
What AI can flag during recovery
AI monitoring tools can track a range of visual changes across submitted photos, including swelling trends, asymmetry, pigment shifts, redness, bruising progression, and delayed healing. Some tools can also assess skin changes across the neck, torso, arms, and legs, which helps with body treatments.
AI flags are a prompt for human review. If there is infection, broken skin, persistent irritation, or any unexpected change, move to an in-person visit. Clear escalation protocols need to be documented before any remote monitoring program goes live. In plain terms, the clinic should define exactly which flags trigger a same-day call or an in-clinic visit. The trigger and the response should both go into the patient record.
That is why remote review must stay tied to in-person escalation.
In-person follow-up versus AI-enabled remote checks
In-person and remote follow-up solve different problems.
| Feature | In-Person Only | AI-Enabled Remote Monitoring |
|---|---|---|
| Safety | Full physical assessment, including tactile feedback | Visual trend tracking; escalation required for tactile concerns |
| Convenience | Requires travel and scheduled clinic time | Patients submit from home via smartphone |
| Staff time | Dedicated room and clinician time for every check | Clinician reviews flagged cases asynchronously |
| Patient access | Limited by clinic hours and geography | Supports check-ins outside clinic hours and across distances |
| Documentation quality | Manual notes and in-clinic photography | Automated AI audit trails and standardised image timelines |
| Limitations | Higher overhead; slower response to minor changes | Requires patient compliance with photo protocols; no tactile data |
For Canadian practices, remote monitoring extends follow-up between visits, which matters a lot for patients who travel long distances. Remote check-ins can widen access without taking clinicians out of the loop, while also helping teams spot recovery that is drifting from the expected path early.
Limits, safeguards, and a practical implementation checklist
Bias, limited validation, and over-reliance risks
Once AI shifts from analysis to day-to-day use, clinics need clear guardrails. AI outcome monitoring is only as good as the data it was trained on. And performance can drop with darker skin tones, older patients, or uneven lighting.
That matters even more when clinics use AI scores to compare progress over time. A highly consistent image set may look reassuring, but it does not prove a better clinical result.
| Limitation | Risk | Mitigation Measure |
|---|---|---|
| Bias | Models may underperform on diverse skin tones or ages | Use tools validated across diverse populations; maintain clinician oversight |
| Limited validation | Algorithm agreement does not guarantee clinical success | Validate AI findings with physical assessments and standardised metrics |
| Data security risk | Unauthorised access to sensitive patient photos | Implement encryption and designate a Privacy Officer |
| Software updates may change performance | AI accuracy may decline after updates | Regularly audit AI outputs against known clinical benchmarks |
| Over-reliance | Staff may defer too much to AI suggestions | Keep human-in-the-loop protocols; treat AI as decision support only |
Staff need one rule drilled in from the start: treat AI output as decision support only. Never act on a flag without clinical review.
Canadian governance: consent, privacy, and Health Canada checks
After technical validation, the next step is legal and privacy compliance.
Consent needs to be specific. Patients should know when AI is being used to analyse their images or help inform their care. You also need separate consent forms for clinical use, internal training data, and social media use. Consent for one does not cover the others.
On the privacy side, private clinics in British Columbia fall under the Personal Information Protection Act (PIPA). Cross-provincial and cross-border data handling may also trigger PIPEDA duties. Both require reasonable security safeguards and a designated Privacy Officer. Before you sign with any vendor, confirm where patient data is hosted and exactly who can access it.
For device licensing, check the Medical Devices Active Licence Listing (MDALL) database before buying any AI-enabled hardware or software used for diagnosis or treatment planning. Under Canada's Medical Devices Regulations, Class II, III, and IV devices need a Medical Device Licence (MDL) from Health Canada. U.S. FDA clearance or ISO 13485 certification does not replace a Canadian MDL. You should also confirm that the supplier holds a Medical Device Establishment Licence (MDEL). Do not import unlicensed devices.
Conclusion: key steps for adopting AI outcome monitoring responsibly
Keep the workflow tight and consistent:
- Standardise image capture
- Validate outputs
- Document every use
- Keep human review mandatory
- Require clinician sign-off at every step
- Protect image data under the privacy law that applies
- Train every staff member before the system goes live
Every AI-assisted decision should be documented in the patient record.
Beauty Pro Supplies Canada can support the equipment and training side of a consistent monitoring workflow.
FAQs
How do I standardize clinical photos?
Use medical imaging software with alignment guides and ghosting features to keep positioning, lighting, and angle consistent across sessions. That consistency matters. It gives you a like-for-like record, which makes outcome monitoring far more accurate.
Also, get separate written consent for clinical photography. This should be handled apart from treatment consent, not bundled into it.
Keep all images natural and realistic. Digital manipulation or any other alterations are prohibited.
Can AI replace clinical judgment?
No. AI can help with outcome monitoring. That includes skin analysis, photo-based comparisons, and treatment-planning suggestions. But it should not replace clinical judgment.
In Canada, clinics still need compliant, evidence-backed claims, accurate documentation, and proper consent. In practice, that means staff should treat AI as a decision-support tool, not the final word. Professional assessment is still needed to interpret results, adjust care, and confirm expected outcomes.
What Canadian compliance checks matter most?
In Canada, the main compliance checks for AI outcome monitoring include:
- Health Canada rules for devices used in cosmetic treatments, including documented safety testing
- Product compliance and traceability, such as any required approvals or notifications, bilingual labelling, and batch tracking
- Client consent and thorough records for treatments and follow-ups to help cut complaint and audit risk
Leave a comment