

How Vacuum Body Sculpting Devices Support Clinics
If I want vacuum body sculpting to work in a clinic, I need three things in place first: a clear service menu, fixed booking blocks, and written treatment and cleaning steps. That’s the short answer.
Here’s what matters most:
- Pick the right format: vacuum-only for shorter add-on visits, or RF + vacuum for longer contouring appointments
- Package treatments as a series: most clinics book 6 to 10 sessions, often every 1 to 2 weeks
- Set fixed visit lengths: about 30–45 minutes for one area, 45–60 minutes for more than one area, and 60–75 minutes for combo visits
- Pre-book the full series: this helps cut gaps in the calendar
- Use the same checklist every time: consent, screening, photos, measurements, treatment notes, and aftercare
- Follow Canadian clinic rules: check for a Health Canada licence, use disinfectants with a DIN, and follow provincial IPAC rules
- Assign each task to one role: front desk, technician, and supervisor should each know what they own
One detail stands out: after treatment, clients are often told to drink 1.5–2 L of water over the next 24–48 hours, and clinics often review photos and measurements every 3 to 5 sessions. Small systems like that help keep care and charting consistent.
Quick comparison
| Option | Best fit | Usual booking time | Common series |
|---|---|---|---|
| Vacuum-only | Add-on shaping, drainage support, shorter visits | 30–45 min | 6–8 sessions |
| RF + vacuum | Firmer contouring and skin-tightening support | 45–75 min | 8–10 sessions |
| Cavitation + vacuum + RF | Multi-step body contouring plans | 60–75 min | 8–12 sessions |
Put simply: if I add vacuum body sculpting without set pricing, booking rules, and cleaning SOPs, the day can get messy fast. If I build those parts first, the service is much easier to run.
sbb-itb-8ec3e54
How to Build Vacuum Services Into Your Clinic Menu
Vacuum Body Sculpting Treatment Options: Time, Sessions & Client Fit
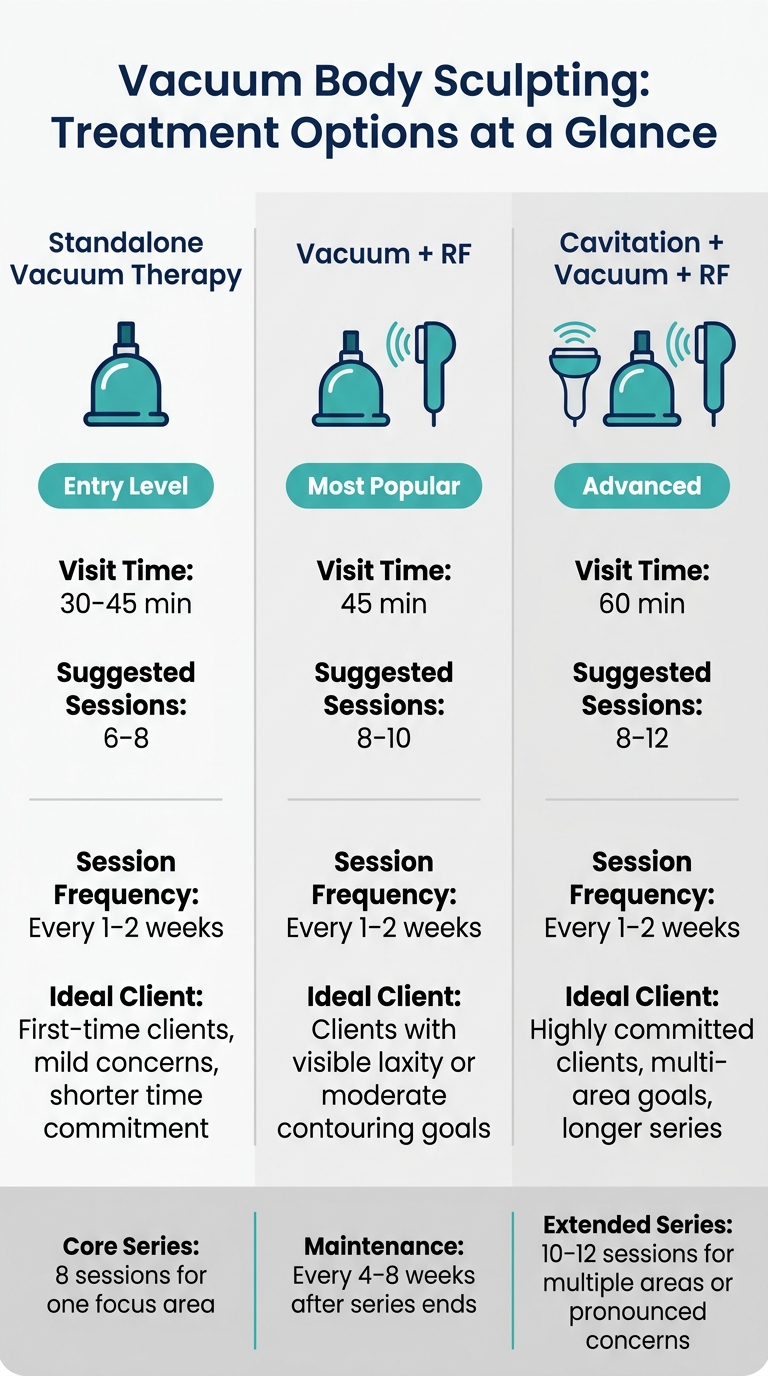
A clear menu makes life easier for everyone. Your team can book faster, explain choices the same way, and guide clients without second-guessing. One simple setup is to offer vacuum body sculpting at three levels: standalone, dual-modality, or a multi-modality package.
Each level comes with its own time commitment, price point, and type of client. That gives your front desk a simple way to match the service to the person on the phone instead of trying to explain every device from scratch.
Once you’ve set the service types, add them to the menu in a way staff can explain in seconds. For standalone vacuum, use a short label that signals a lighter, faster contouring visit. For combined services, give one plain sentence on what each device does so staff can answer questions fast and stay consistent.
Pair Vacuum Treatments With Related Body Services
After you’ve set the menu level, decide which services make sense to sell together in one visit. Common pairings include:
- vacuum + RF for contouring and skin-tightening support
- cavitation + vacuum for fat-reduction support and improved drainage
- manual or device-assisted lymphatic drainage + vacuum for post-procedure fluid movement and shaping
For combined visits, keep the treatment order consistent. Start with cavitation on the target area. Follow with vacuum sculpting to support lymphatic drainage and contouring. Finish with RF if the client’s goals and device protocols allow for it.
Write that sequence into your SOP so every team member books and performs the service the same way. And before you package it as one service, check that the flow matches each device’s instructions for use.
Set Clear Packages and Pricing
Build packages around treatment goals, but keep the booking process simple. Many non-invasive body-contouring clinics use series-based packages of 6 to 10 sessions for vacuum-inclusive treatments. These are often booked 1 to 2 times per week, based on device recommendations and client tolerance.
A practical setup is an 8-session core series for one focus area, with maintenance visits every 4 to 8 weeks after the series ends. If a client has more pronounced concerns or wants to treat more than one area, a 10- to 12-session extended series can make sense.
Show prices in C$ and include both the per-session rate and the full package total. That way, clients can see the pricing structure at a glance. List prices before sales tax to keep things clear and avoid awkward checkout surprises.
| Treatment Type | Typical Visit Time | Suggested Sessions | Ideal Client Profile |
|---|---|---|---|
| Standalone Vacuum Therapy | 30 min | 6–8 | First-time clients, mild concerns, shorter time commitment |
| Vacuum + RF | 45 min | 8–10 | Clients with visible laxity or moderate contouring goals |
| Cavitation + Vacuum + RF | 60 min | 8–12 | Highly committed clients, multi-area goals, longer series |
How to Schedule Vacuum Treatments Into a Busy Clinic Day
Treat each vacuum appointment like a fixed block on the calendar, not just a set of treatment minutes. That means the service time, plus protected buffer time, gets booked from the start. Once the package is chosen, turn it into fixed booking blocks so the day stays orderly and the room isn't squeezed from one client to the next.
Match Appointment Length to the Treatment Area
Single-area sessions usually take 30–45 minutes. That time should cover a brief intake update, the treatment itself, and a short post-session buffer.
Multi-area sessions often need 45–60 minutes. The extra time gives staff room for repositioning and parameter changes between zones without rushing.
If vacuum is paired with RF or cavitation, plan for 60–75 minutes. That added time covers consent review, pre-treatment photos, charting, and room turnover. On top of that, build in a minimum 10-minute buffer between back-to-back bookings as protected time in your scheduling software, so the room can't be double-booked during cleanup and documentation.
Book the Full Series at the First Visit
Putting the full series on the calendar from day one helps prevent gaps and makes weekly planning much easier. Pre-book the full course at the first visit. If a client comes in at the same day and time each week - say, every Thursday at 5:00 p.m. for eight weeks - that slot becomes a steady part of the schedule.
That kind of rhythm helps coordinators fit shorter services around the block and keep the day from getting lopsided. It also makes packaged pricing easier to manage. Book the full course in advance, tie it to packaged pricing, and set a clear cancellation policy.
| Appointment Type | Typical Duration (minutes) | Typical Interval |
|---|---|---|
| Single-area session | 30–45 | Every 1–2 weeks |
| Multi-area session | 45–60 | Every 1–2 weeks |
| Combination (vacuum + RF) | 60–75 | Every 1–2 weeks |
| Maintenance visit | 30–45 | Every 4–8 weeks |
For Canadian clients, it's smart to plan the series start date around seasonal disruptions. A core series should begin 8–12 weeks before the target date. That gives enough room for holidays, weather delays, and reschedules without throwing off the full plan.
Next, standardize prep, treatment, and turnover so every block runs the same way.
How to Standardize Prep, Treatment Steps, and Sanitation
Consistent protocols are what separate a clinic that runs smoothly from one that depends on staff memory. The aim is simple: every visit follows the same path and fits neatly into the day’s schedule. Once the booking block is set, keep the prep, treatment, and turnover sequence the same for every appointment.
Use the Same Pre-Treatment Checklist Every Time
Before any vacuum session starts, staff should follow a fixed checklist instead of going by memory. First, get signed informed consent that explains expected results and possible reactions like temporary bruising or swelling. Store that in the client file under provincial privacy rules.
Next comes contraindication screening. This is where you slow down and look for issues that mean treatment should stop or be changed. Red flags include a history of deep vein thrombosis or clotting disorders, uncontrolled hypertension or diabetes, recent surgery in the treatment area without medical clearance, implants or fillers near the zone, active skin infections or open lesions, and pregnancy. Follow clinic policy and the device IFU. If any red flag comes up, document it with the date and note it in the booking system as "hold - medical review required."
After screening, take standardised baseline photos using the same lighting, angle, and posture each time. Then take circumferential measurements in centimetres with a metric tape, such as the waist at the umbilicus or the hip at the greatest circumference. Ask the client to remove jewellery and accessories from the treatment zone. Cleanse the skin well to remove oils, SPF, and product residue. Finish by marking the treatment zones and any no-go areas, like spots over bony prominences, with a skin-safe marking pencil.
Follow a Set Treatment and Aftercare Sequence
Start at the manufacturer’s low setting, test tolerance, and then increase within device limits. Test a small area first, record comfort on a 0–10 scale, and stay within the client’s tolerance. Watch for immediate pinpoint bruising or too much redness before moving ahead.
Once tolerance is confirmed, record the final suction setting in kPa or mmHg and note the mode, whether continuous or pulsed. Move strokes toward drainage pathways, from distal to proximal on the limbs and toward the inguinal or axillary nodes. Keep passes per zone within protocol, usually 2–3 passes per segment, and keep total treatment time inside the set range for that area.
After the session, inspect the skin for even redness and check that the client feels okay. For aftercare, tell them to drink 1.5–2 L of water over the next 24–48 hours. They should also avoid alcohol, high-sodium meals, and intense exercise for 24 hours. Let them know that temporary redness, mild swelling, and tenderness are normal and usually settle within hours. If they notice severe bruising or changes that don’t go away, they should report it right away.
Document the treatment date in YYYY-MM-DD format, the areas treated, device model, cup sizes, suction range, time per zone, client tolerance scores, and any reactions. Update photos and measurements at planned intervals, such as every 3–5 sessions.
Assign Room Turnover and Disinfection by Step
Room turnover should follow a clean–rinse–dry–disinfect sequence. For reusable cups, wash them with an enzymatic or mild detergent solution, rinse well with potable water, and dry them before applying a DIN-approved disinfectant. That dry step matters. If you skip it, you dilute the disinfectant and weaken its effect.
Health Canada requires a Drug Identification Number on disinfectants used on environmental surfaces or non-critical medical devices in Canadian clinical settings. For non-immersible parts like handpieces or control panels, put disinfectant on a cloth or use a pre-saturated wipe. Don’t submerge them. Follow the manufacturer’s instructions for use.
| Turnover Step | Action | Target Time | Responsible Role |
|---|---|---|---|
| Remove and sort items | Dispose of single-use items; move reusable cups to cleaning area | 2 min | Practitioner / Support Staff |
| Clean reusable cups | Enzymatic or detergent wash, rinse, dry | 5–7 min | Support Staff |
| Disinfect contact surfaces | Apply DIN-approved product; maintain full wet contact time | 3–5 min | Support Staff |
| Wipe handpieces and controls | Wipe handpieces and panels per manufacturer IFU | 2–3 min | Practitioner |
| Check and replace filters | Inspect external waste filter; replace if buildup is visible | 1 min | Practitioner |
| Replace linens and restock | Fresh linens, disposable covers, gels, and consumables | 3 min | Support Staff |
| Final readiness check | Confirm room, device, and documentation are ready | 2 min | Practitioner |
Room turnover time, separate from the scheduling buffer, should aim for 20–25 minutes between clients. Keep cleaned items separate from items still waiting to be processed. Labelled bins or dedicated shelves make that much easier and help prevent cross-contamination.
When handling disinfectants, practitioners should wear protective gloves, a mask, and eye protection. External waste filters should be checked between clients and replaced when buildup appears.
With the workflow set, the next step is to assign each task to the right staff role so the room keeps moving without delays.
How to Train Staff and Keep Treatments Running Smoothly
Once prep, treatment, and sanitation are standardized, the next step is simple: give each part of the workflow a clear owner. That’s what keeps the day moving and helps appointments stay on schedule.
Define Staff Roles From Intake to Follow-Up
Most delays don’t come from the treatment itself. They come from fuzzy handoffs. One task gets done twice, another gets missed, and suddenly the whole visit runs late.
A cleaner setup looks like this:
- Front desk handles inquiries, booking, forms, payment, and rebooking.
- The technician verifies intake, performs the treatment, documents the session, and reviews aftercare.
- The clinical supervisor approves protocols, reviews higher-risk cases, and reviews charts for quality and compliance.
When each step belongs to one role, the series runs the same way every time. That consistency matters. It cuts confusion, keeps staff aligned, and makes the client experience feel smooth from start to finish.
Training is what turns those roles and SOPs into day-to-day habits.
Use SOPs, Checklists, and Training Resources
Role clarity falls apart fast if the process only lives in someone’s memory. Each step needs a written SOP.
Each vacuum service should have its own SOP. It should cover indications, contraindications, device settings by body area, session length, pre-treatment steps, in-treatment sequence, post-care instructions, sanitation protocol, documentation fields, and escalation criteria for adverse events.
Staff also need clear direction on the moments that matter most: when to stop a treatment, who to notify, and how to document what happened. If that part is vague, mistakes can snowball.
For new technicians, training should include theory, supervised practice, and competency sign-off before they work alone. After that, annual refreshers and protocol updates help keep skills current as your clinic changes.
Beauty Pro Supplies Canada also offers professional supplies and online training resources that can support onboarding and help standardize workflow.
Conclusion: Add Vacuum Services Without Disrupting Your Workflow
Adding vacuum body sculpting to an existing clinic menu is manageable when the systems are set up before the first appointment is booked.
Here’s the practical playbook: pair treatments with related body services, match appointment blocks to the treatment area, and book the full series at the first visit. Then standardize prep, treatment steps, and sanitation with the same checklist every time. From intake to post-visit follow-up, assign each task to a specific staff role and back it up with a written SOP.
Clear roles and checklists keep the service efficient, safe, and consistent.
FAQs
How do I choose between vacuum-only and RF + vacuum?
It depends on your clinic’s goals for treatment depth and service range. Vacuum-only systems focus on mechanical stimulation, which makes them a good fit for lymphatic drainage and basic tissue mobilization.
RF + vacuum adds heat-based skin tightening to mechanical suction. Your choice comes down to your service focus: simple contouring or a broader body sculpting and skin tightening offering.
What should a clinic prepare before offering this service?
Before you offer vacuum body sculpting, get your setup ready with Health Canada-approved sanitation and disinfection supplies, cleaning logs, and disposable barriers like fresh couch roll or paper covers.
It also helps to keep equipment upkeep items on hand, such as replacement filters. Staff should wear the right PPE, follow reusable-tool handling protocols between clients, and clean first, then disinfect for the full label contact time before drying and storage.
How can clinics keep treatments on time and consistent?
Clinics can stay on schedule and keep care consistent by using standard protocols and planning ahead for equipment upkeep. Devices with programmable protocols make it easier to tailor each session without letting results drift from one appointment to the next.
A simple setup goes a long way:
- Keep sanitizing wipes at every workstation
- Use a cleaning checklist for daily tasks
- Replace waste filters on a regular schedule
- Fine-tune settings with suction adjusters
- Maintain detailed cleaning logs
This kind of routine helps teams work smoothly, cuts down on avoidable issues, and keeps treatment rooms ready for the next client.
Leave a comment